I made a Dust Collector – Part 3

So… I may owe some level of explanation for waiting a year between my last post and this one…

Maybe.

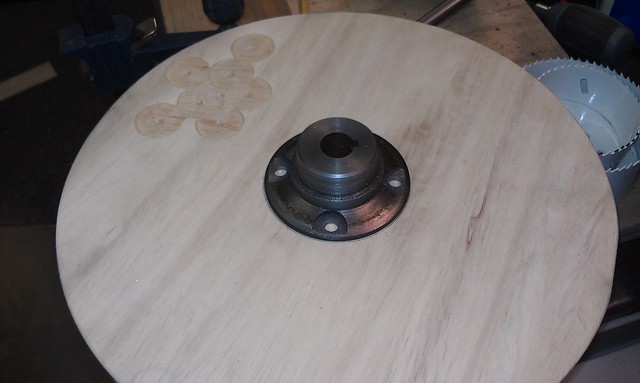
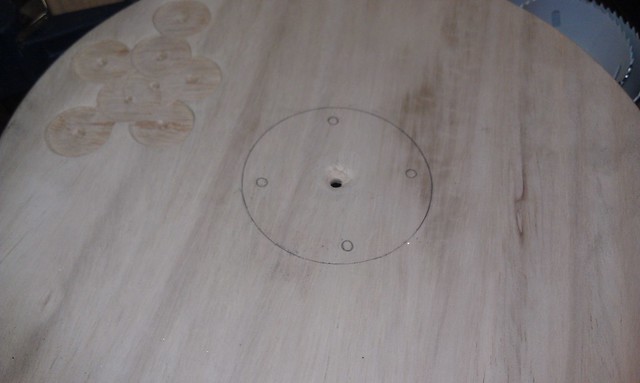
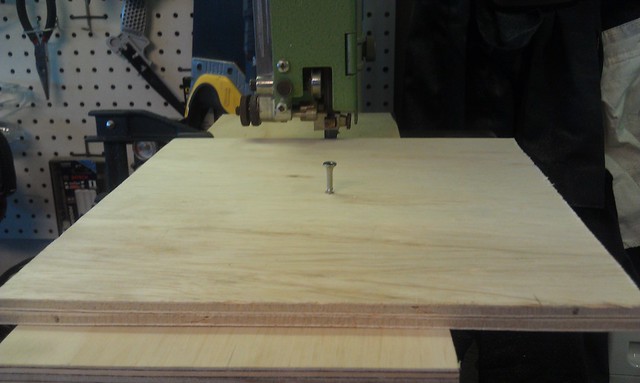
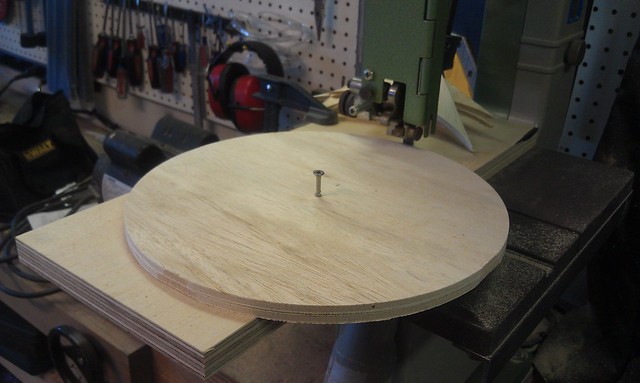
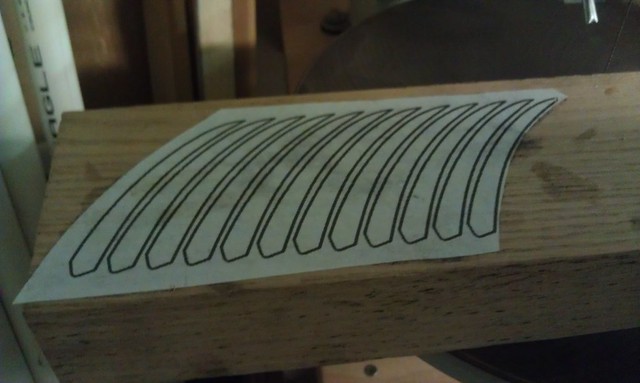
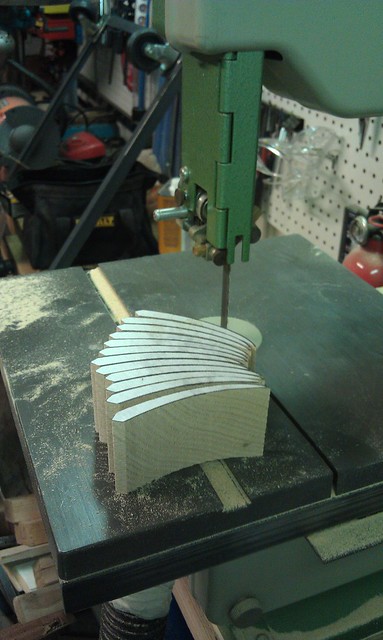
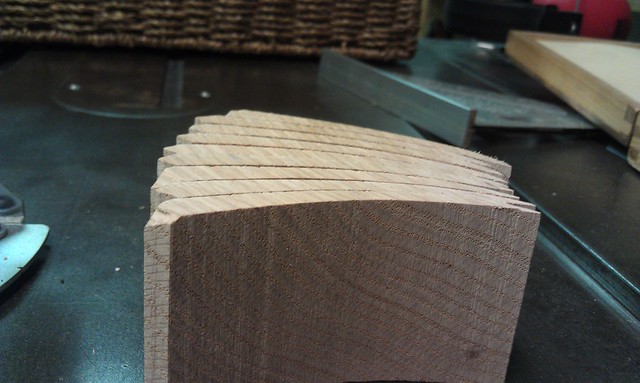
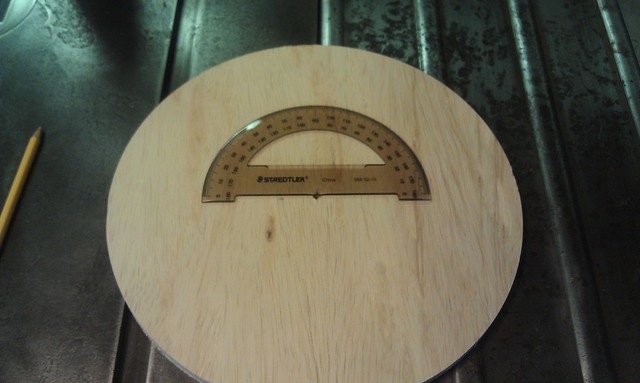
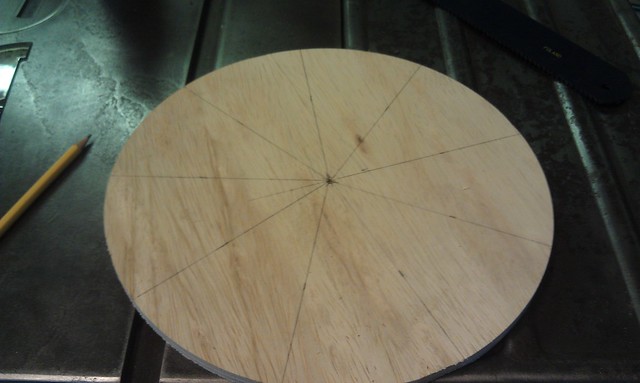
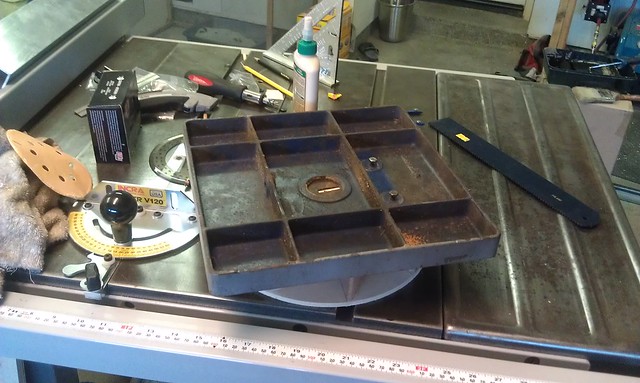
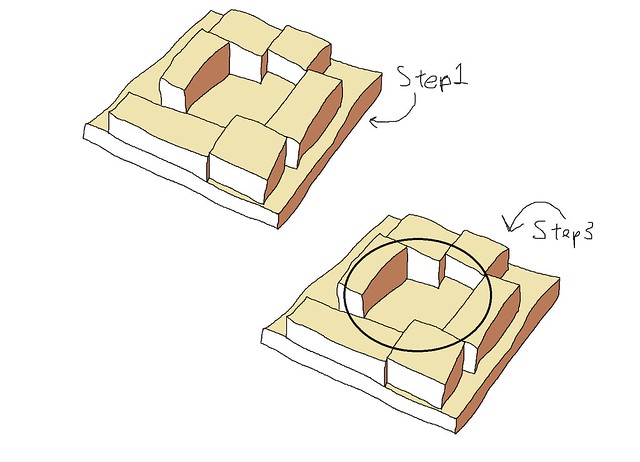
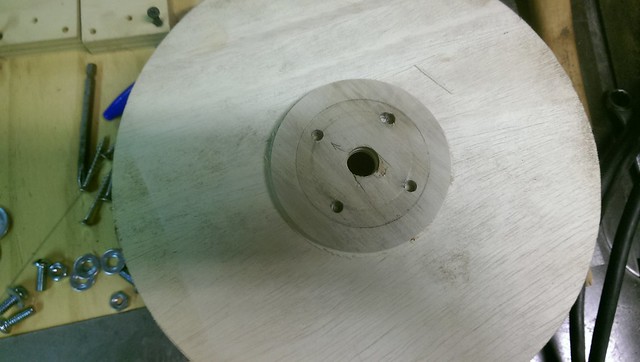
I made a housing for my impeller by arranging several blocks of red oak on a piece of plywood and then tracing the perimeter of my impeller onto the blocks of wood.

I appear to have lost any photographic record of this step, so please view the following for reference:
Step 2 was awesome, sorry you missed it.   
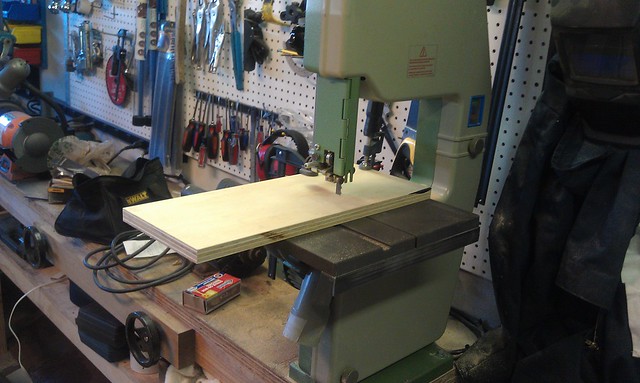
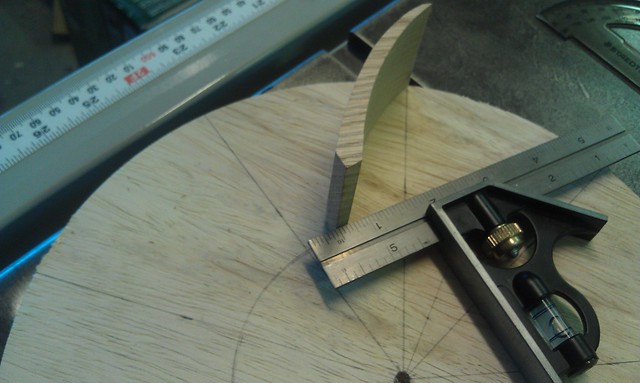
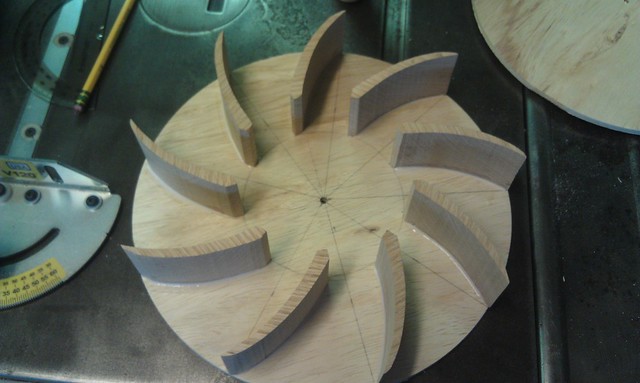
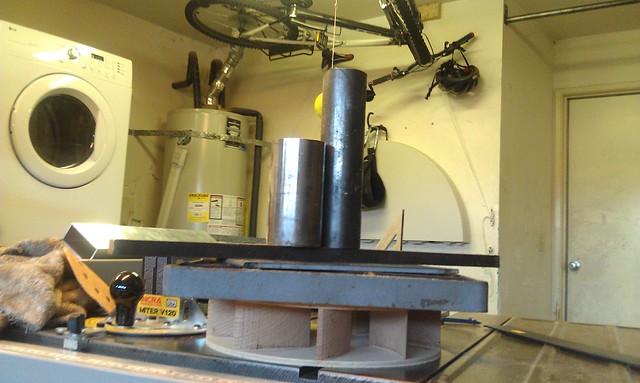
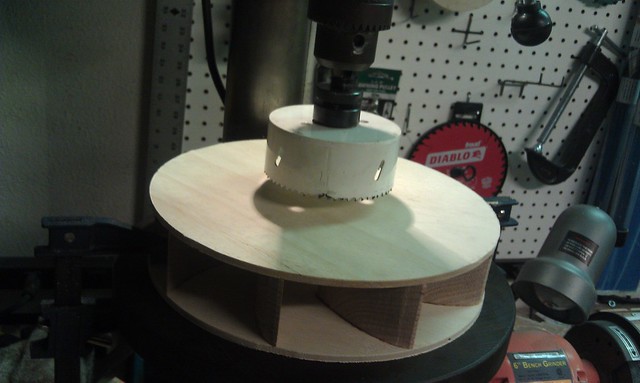
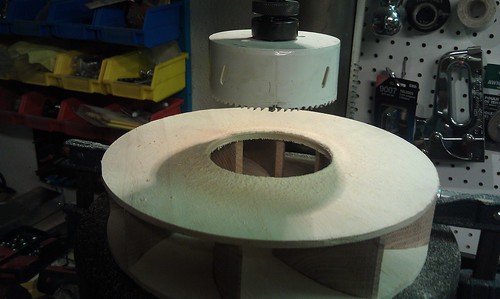
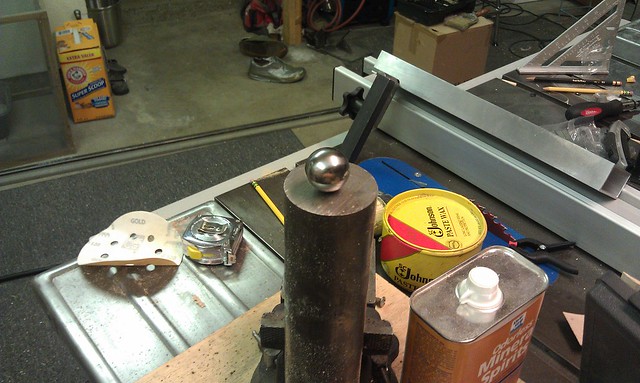
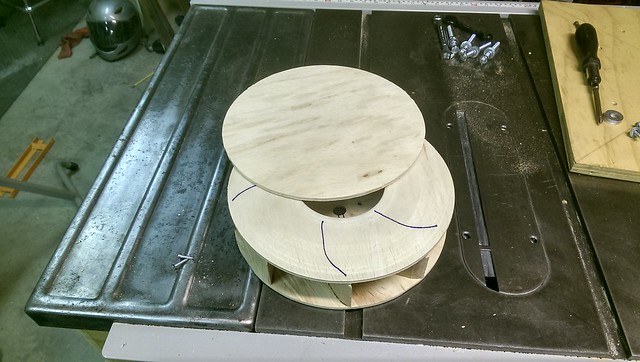
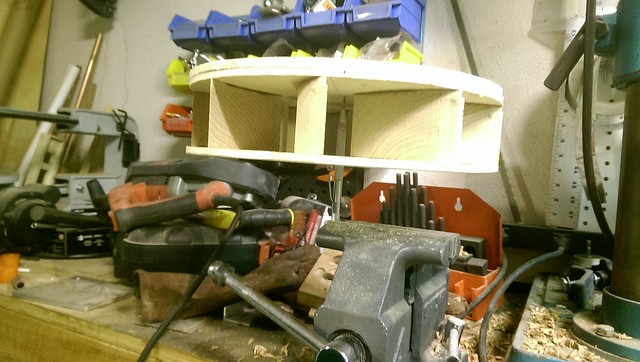
I then cut this line on each piece using my bandsaw. I rearranged the cut blocks so that they made the correct shape and then screwed them on to the piece of plywood. i also smeared from Bond-O on to the inside circumference to smooth out inconsistencies and plug any gaps.  I drilled a large hole into the center of the plywood to pass the motor through and made a little platform for the motor to rest on. cowling2
I found a picture!

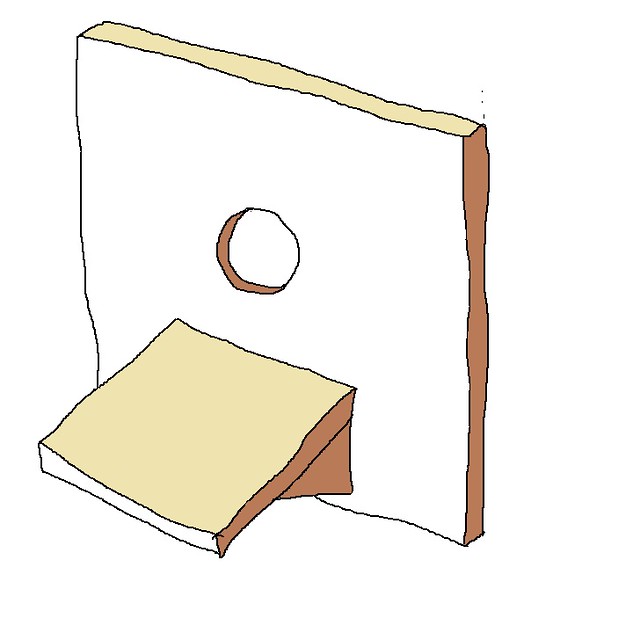
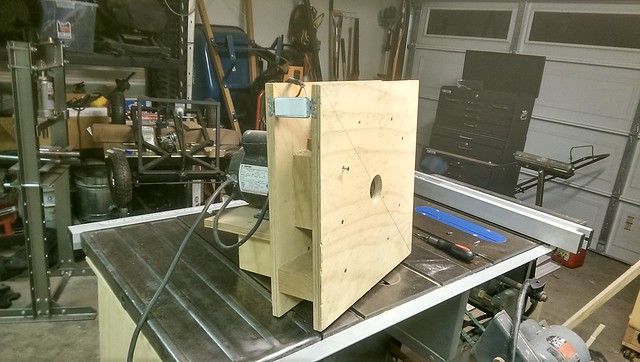
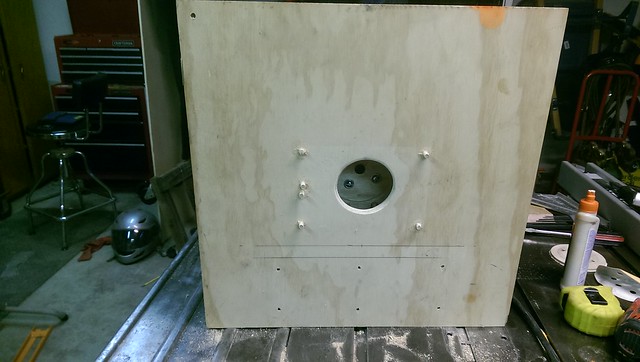
After cutting a hole in the front piece, I slapped everything together for another test. It Sucked. But not as much as I hoped. I sat and pondered. and then got distracted. For a year. At some point during that year, I realized why my dust collected only sucked a little, but still waited a number of months before doing anything about it. Let’s play a fun game: Can you figure out what was wrong with my dust collector? ...duh.
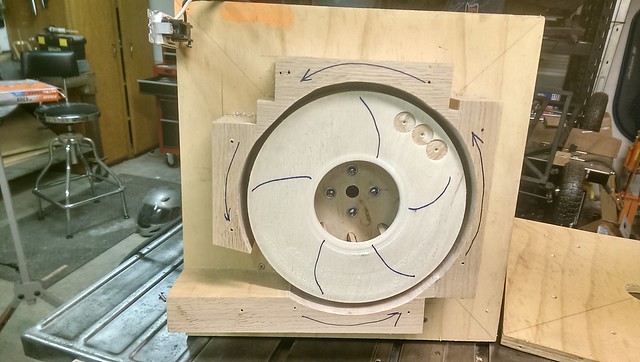
=== SPOILER ALERT! ===
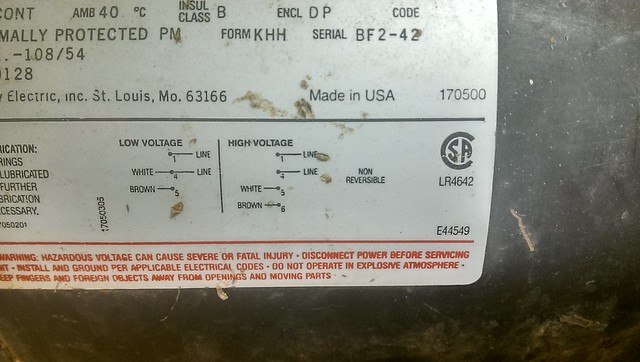
The impeller is spinning the wrong way. To make matters worse, the motor is unambiguously non reversible.
IMAG2092
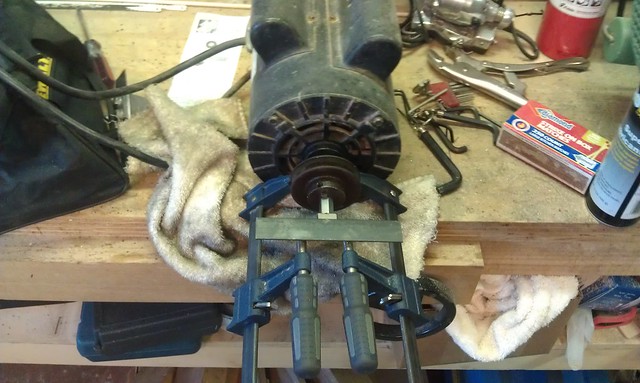
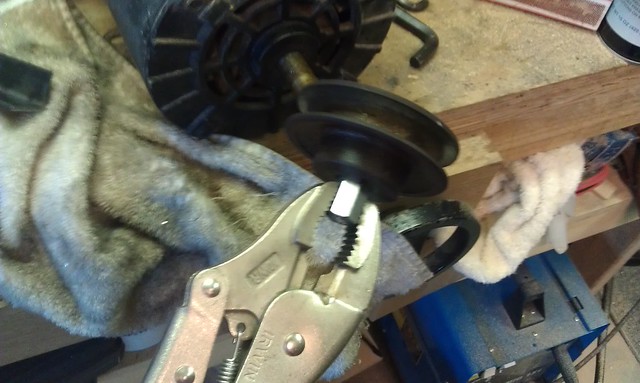
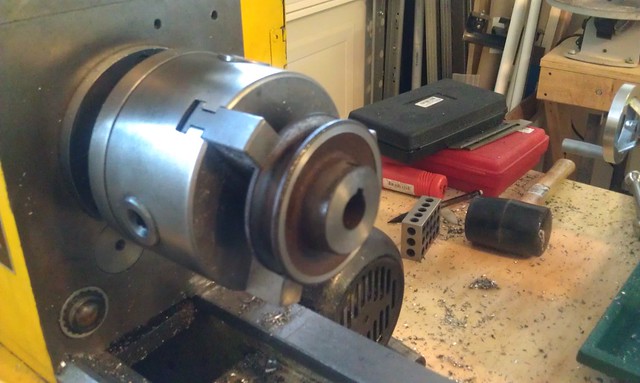
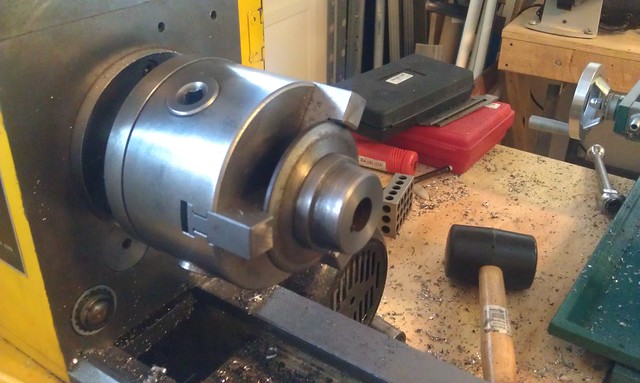
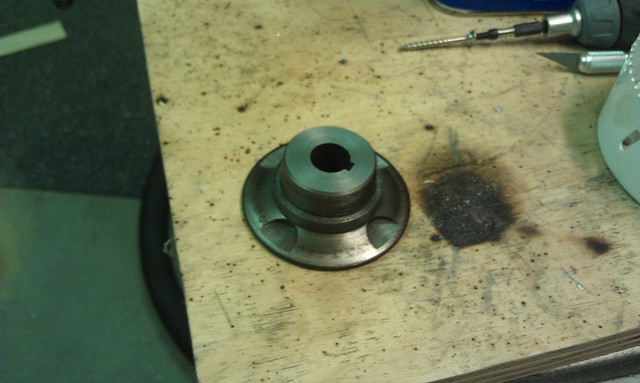
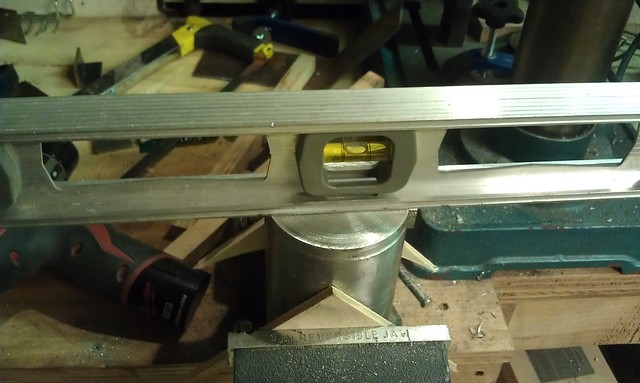
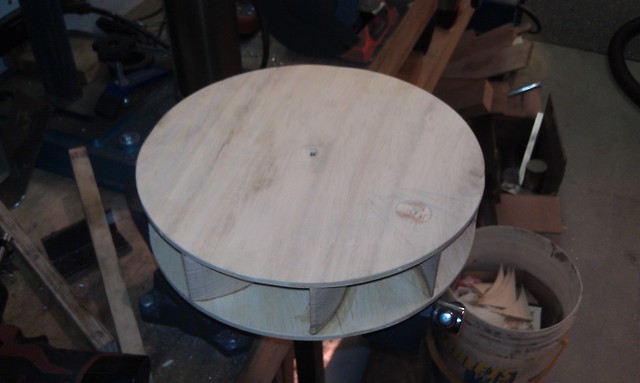
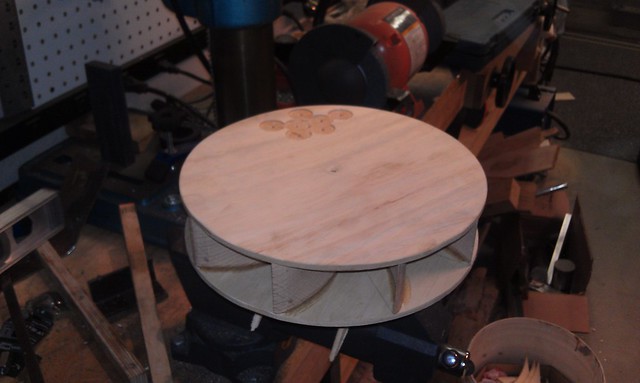
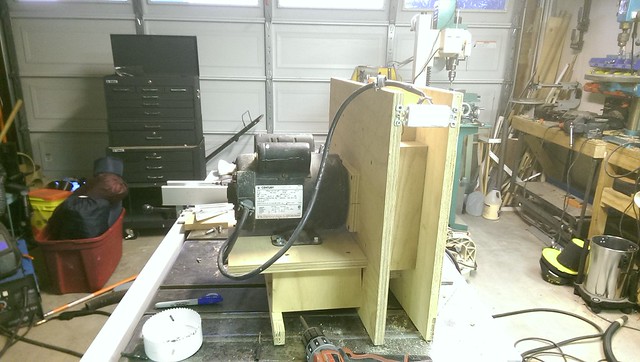
So I immediately (when I felt like it) got to work. I decided to solve the problem by moving the motor around to the “front” of the assembly. This also meant that I needed to keep the impeller in the same orientation relative to the housing, and so I needed to turn the back of the impeller into the front and re-mount it on the motor shaft:IMAG2093
back coverbalancing
transferring the old hole locations to the new backplugging unnecessary holes
done now. still done.
okay, NOW I'm done.
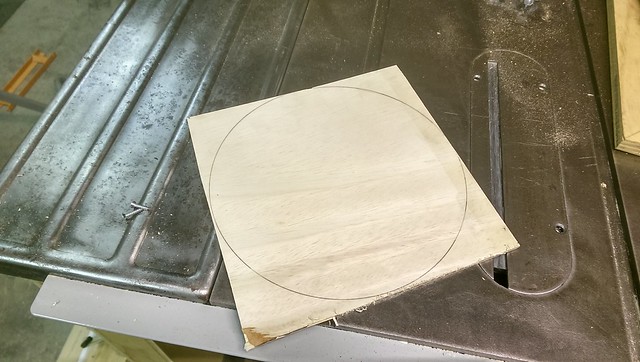
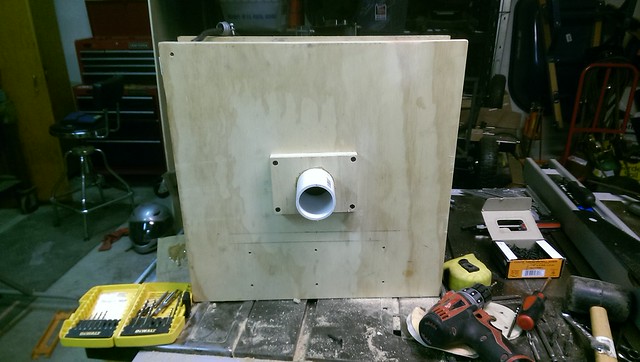
Easy peasy. I powered it up for a test run, and promptly woke my son up (I have a son, he’s almost 2 and he was asleep).

IMAG2100

Needless to say, it was louder than I hoped.

I had recalled Wandel doing some testing around making his impeller design quieter and subsequently much, much louder to make an air raid siren. So I scoured his website and failed to find the article I was looking for, but did find a comment of his on someone else’s dust collector design where he noted that “the smaller the gap between the impeller and the housing, the louder it will be.”

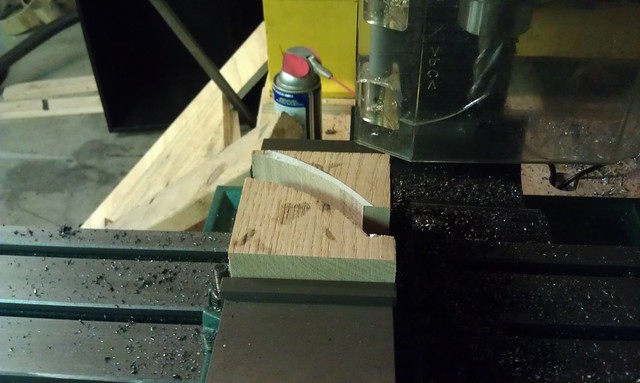
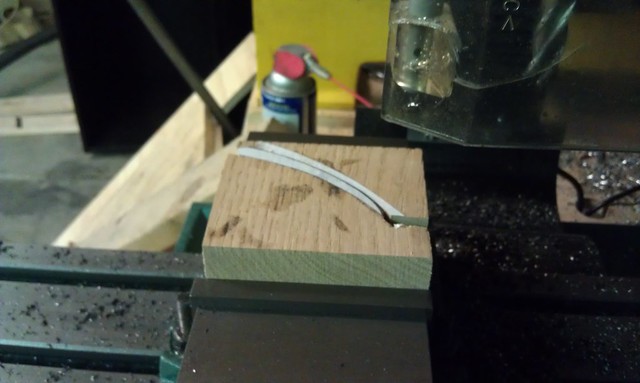
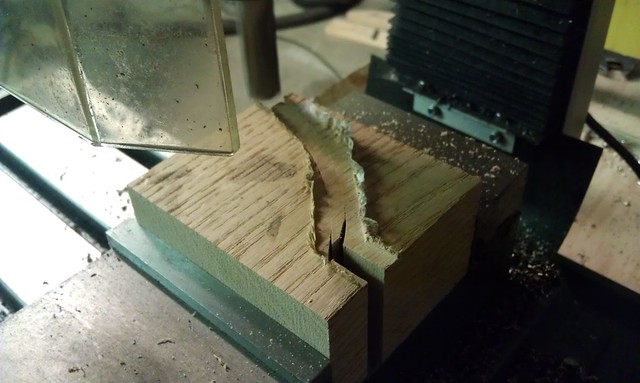
So I shaved 1/4″ off the perimeter of my impeller using my bandsaw and put everything back together.

Then I waited until my son was asleep again (for maximum effect) and tested it again.
This time it REALLY sucked. And it did so very quietly. Almost Dust-Sniper quiet!

And so I set in a corner of my garage until I get time to mount and duct it.

Next June is looking promising…

I made a Dust Collector – Part 2

Curse you Wandel, for stealing my thunder!

Whatever. Nobody cares about your little website anyways.


So, at this stage of the project I had an impeller and a motor, and nothing in between.

I needed something in between.

Fortunately, my motor came with a pulley attached.

IMAG1309


…Very securely attached…

I cobbled together a gear puller with some scrap metal, clamps, a magnet, and a coupling nut.

IMAG1312


Now that I had removed the pulley from the shaft, I proceeded to remove the coupling nut from the pulley…

Impeller - Motor Pulley


Impeller - Motor Pulley


Over at the lathe, I began to cut away at the pulley to turn it into a hub.

Impeller - Hub

Impeller - Hub


Aaaaaaand, it’s a hub.

Impeller - Hub


I laid it on the center of the back of the impeller and marked the locations of the  holes I had drilled in the hub since the last picture…

Impeller - Mount

Impeller - Mount

Off camera, I drilled out the holes and attached the hub to the impeller and the motor shaft.

Impeller - Test

I hooked it up to a foot pedal switch and it was time for a test!


Holy crap! Time to change my underpants!


…to be continued.

I made a Dust Collector – Part 1

A while back I bought a leaky air compressor for $50 because it had a good 3HP motor on it that I figured I could use someday for something, probably.

When Mr. Wendel built a small dust collector with a tile saw motor, I knew my old motor had found its destiny.

Little did I know that this would lead to one of the scariest things I have ever built (and I’ve made a good number of catapults and potato cannons in my day).

I needed to make three things: an impeller, a cowl, and a motor mount.

Everything I needed I already had laying around, so I figured this would be a good way to use my tools and my time. At the very least it would be an educational experience.

First: Thing 1 – Impeller

To start, I cut some 1/4″ plywood into two identical discs by taping two squares together with double-sided tape and then spinning them across the blade on a screw I had driven through a thicker board (a rudimentary form of a dedicated circle-cutting jig)
Impeller - discs
Impeller - discs
Impeller - discs
Impeller - discs

A piece of oak I had in my scrap bin became the impeller fins. I printed out a template and glued it to the piece of wood and then cut out the pieces freehand on my bandsaw.
IMAG1187
Impeller - Fins

Since this was a remnant piece of wood, it was not the same thickness all the way through, so I removed some wood from the top of each fin after setting it against the bottom of my milling machine vice to ensure that they were all the same height.
Impeller - Fins
Impeller - Fins
Impeller - Fins
Impeller - Fins

Using 9 fins, the math was easy, I placed a fin every 40-degrees around the bottom disc. The tilt was determined based on what looked best to me, then I just measured the offset from the 40-degree lines and placed the tip of the fin on one line and base of the fin on the other.
Impeller - Assembly
Impeller - Assembly
Impeller - Assembly

After setting everything in place dry and ensuring in all aligned properly, I applied glue to the top and bottom surfaces, set them in their pre-determined places around the bottom disc, and then set the second disc on top.
Impeller - Assembly

I didn’t want to mess with clamps, so I set the assembly on a known flat surface (my table saw) and set another known flat surface on top (yes, that’s the table top from the old scroll saw) and piled some heavy metal pieces on that.
Impeller - Assembly
Impeller - Assembly

After letting the glue set overnight, I took the assembled impeller to the drill press, where I used a 4-inch hole saw to open one side as the air inlet.
Impeller - Inlet
Impeller - Inlet

Next I set a large ball bearing on top of a metal cylinder in the vise and balanced the impeller on top of it.
Impeller - Balance
Impeller - Balance
Impeller - Balance

I used a forstner bit to remove wood from the heavy side until the impeller stayed level while balanced on the bearing.
Impeller - Balance

So, now I had the impeller… part 1 complete.

I Built a Website!

As I have previously noted, I have too many hobbies.

Between work, babies, projects, and marriage, I don’t really have time to devote to all of my interests, so I tend to focus on them cyclically over time (you could say I binge on them).

One on my favorite recurring pastimes is insulting people.

More specifically, I love coming up with new ways to insult people. Not necessarily specific people, more just people in general.

I’ve been dabbling in this pastime on and off for the last 9 years, and have really gotten quite good at it.

While extending the boundaries of known derogatory methods, I have noted that, surprisingly,  many people do not share this passion, and consequently have not developed this skill for themselves.

In the interest of enabling these people to experience the joy that I feel, without the tedium of developing their own debasing abilities, I built a website: dissincorporated.com

Using this website, I have chronicled my slanderous breakthroughs in the form of 5-inch by 7-inch greeting cards.

For example, card# 006:

Front

2.8cm

inside

Now anyone in the greater United States of America can share in the pure bliss that comes from flinging disparagement at a Master level.

A word of warning: During these last 9 years, while developing my skill, I have also developed, through trial and error, a certain level of discretion, and a shrinking number of friends.

Not every opportunity to deliver a crushing blow should be seized… or so my wife tells me.

I know that there is grave danger in enabling those without my benefit of experience to wield such devastating wit, but I believe that there is peace in equality, and who am I to hoard such power to myself?

And so I freely share with all, the fruits of my endeavor,  for only $3.25 per card plus applicable shipping charges.

I Made A Ladder!

Yes, I did.

Please note that I did not title this post “how to make a ladder”.

This was for my daughter’s play set in the back yard, which has had my 6-foot stepladder leaning against it for a few weeks now.

I started by leaning a 6-foot length of redwood against the play set to figure out what angle the ladder should lean at.

Ladder
This was close enough to 30-degrees, so I used 30 as my number.
I cut two lengths of redwood to length with matching 30-degree cuts on the top and bottom edges.
Ladder

Then I used a tape measure to mark intervals on both pieces to note where the center of each step should be.
Ladder

I used the table saw and the miter gauge to cut slots at 30-degrees to make the edges of a mortise; and then used a router to freehand cut the insides out (working carefully, the kirf of the table saw cut is enough of a buffer to rout this out freehand).
Ladder
Ladder

Since I’m not very good at measuring, the mortises were all too narrow, so I slapped together a little tenoning jig to trim the ends of the steps (this was easier than trying to cut all the mortises a little wider).
Ladder
Ladder
Ladder

I successfully got all the steps installed on one rail of the ladder (glue and screws), and then realized that I was not going to be able to get all of the tenons to line up on the other rail. There were little imperfections in the wood and construction, and all together across all the steps this was enough to make it impossible to line everything up at once.

So I made a little router jig (read: “I cut a piece of plywood”) to shave a little more wood off each tenon’s width (the tricky part is that the steps were already installed on one side).
Ladder

Meanwhile I was doing a lot of stepping over and around the half-assembled ladder and managed to catch the corner of a step with the underside of my knee…
ladder

REALLY?!?! Not only am I supposed to wear “close-toed shoes” in the garage, but now I have to wear pants too?!

Next you’re going to say I should be wearing gloves!
Lathe compound repair

Whatever.

Ladder

In any case, that last bit of adjusting with the router worked, and I finished the ladder… and then put on some pants and ate dinner.

Fixing a Fancy Bolt

When I first started using my lathe, I noticed that one of the two small bolts that secured the compound to the cross slide was stripped, and couldn’t be tightened down fully.

But since the other one worked and the compound seemed stable, I postponed the replacement of this bolt.

Recently I had been using my lathe for a lot of stainless steel parts, and the added strain of the harder metal took a toll on the remaining bolt; to the point that, when I tried to tighten it down the other day, it also stripped.
Lathe compound repair

I could procrastinate no longer, I had to fix this thing.

The problem was that the heads of these bolts was a semi-rounded T-bolt and I wasn’t sure if I would be able to find a replacement part easily. Plus I wanted to use my lathe NOW, not wait for shipping.

So I decided to recycle the bolt heads.

Here’s how it went:

First I took the nuts from the bolts and dug through one of the spare parts bins to find a machine screw with the same thread size and diameter.
Lathe compound repair

After this was accomplished, I bashed my knuckle.
Lathe compound repair

Then I place the old bolt shafts in the lathe and drilled the head off after center-drilling and countersinking it.
Lathe compound repair

Lathe compound repair

Lathe compound repair

Next I worked the new screws with a file in my lathe until they fit the countersunk hole nicely.
Lathe compound repair

After I was satisfied with the fit of the heads, I brought them flush on the milling machine.
Lathe compound repair

Then I took them over to the welder and glopped a Cheerio of molten metal on top. This didn’t have to be a very strong weld, just enough to keep the machine screw head from spinning in the T-bolt head.
Lathe compound repair

I used the milling machine again for cleanup, and once I trimmed the bolts to length, I was back in business.

Lathe compound repair

lathe repaired

Adding Cheap And Classy Storage To Your Shop

If your garage is like mine, it’s a mess.

Periodically you spend a weekend cleaning up; cramming your tools and scraps each into their respective spots (or wherever they will fit), and sweeping up the sawdust and shavings, leaving your shop spotless… until you start your next project.

At that point you dislodge a tool and the materials necessary to complete your project, and you may has well have just pulled the pin on a grenade.

A short time later your garage explodes in a flurry of tools and shrapnel, that leaves your garage as bad as it has ever been, and quite possibly worse, while it waits for another free weekend to be cleaned up.

Making matters worse, I have many times promised to get the garage clean enough for my wife to park her car, but I have thus far been unable to maintain the upper hand for long enough to actually pull the car into its place.

After extensive study of this phenomenon, I started to study the root cause. Surely this is not merely a symptom of being a lazy slob. Surely this is not merely my own fault….

…surely…

Thus, having ruled out personal flaws, I decided that the heart of the problem was simple: Storage.

I had some wire shelves, a rolling toolbox, a workbench, a hanging shelf, and a pegboard, but every tool I owned and used was living in increasingly cramped quarters, and there were some obvious opportunities to add enough space to get a little more capacity and flexibility in the storage system.

The first and largest opportunity: my metal working station.
Untitled

Untitled

When I designed my metal working station, I left large openings with the intention of someday building drawers and shelves.

About a week ago I realized I was never going to find it worthwhile to spend a day building a bunch of drawers while I had a backlog of so many more important/interesting projects (swingset, porch lights, shed, small truck for my daughter, speargun, radius cutter for my lathe… and whatever else comes up between now and the finish of those).

What if I just bought some drawers?

At first I thought I thought I’d use a coupon to buy a couple Harbor Freight toolboxes, since they are so much cheaper than anything equivalent from Sears or Home Depot, but I’ would have still ended up spending a few hundred dollars.

What should I do?

Begin theme music! …Possibly after advertisement!

<Note: Please leave this playing while reading the remainder of this article>

Enter the Swedes, stage left!

IKEA TO THE RESCUE!

$40 KULLEN 3 Drawer Chest

$59 - Oh MICKE You're so fine!

Untitled

Untitled

Untitled

Untitled

Untitled

Granted, there’s still a lot of cleanup to do, but I have now added more than enough storage for all of my metal working tools and work pieces.

And at a total of $100, it costed me less than I would have spent on the plywood and drawer slides to make the drawers that I would have never taken the time to build.

Those clever Swedes.

Polespear Upgrades Update

After my previous modifications resulted in a slow spear that kept maiming and releasing fish, I went back to the shop and made it better.

To increase the speed, I ordered a 1/2-inch diameter band, but that turned out to be so stiff that I could barely stretch it, and if I did it bent the spear, so, that didn’t work.

Then I tried just adding a second band to the spear.
Untitled

This actually worked quite nicely. I had effectively doubled the power without making it too difficult to stretch.

Win.

Now to solve the problem of the fish wiggling off the spear.

I wanted to add barbs to the spear tips, so my first thought was to use a file. After looking at my file assortment, I realized that this would remove too much metal, and the barbs would really just be notches, they wouldn’t extend beyond the diameter of the tip, so I’m not sure how effective the would be.

So I instead cut slots at an angle with my hacksaw, and then was able to bend the metal outwards to form a proper barb.
Untitled

Done, and Done.

I went out to test it later that evening.
I didn’t see many fish for a long time, which is always a limiting factor in these tests.

But then, as the sun was going down, I saw a decent sized black perch and squeezed the trigger.

BANG!

The extra power made all the difference and the fish never knew what hit it… because it’s a fish.

The barbs were probably unnecessary in this case, since the polespear nearly blasted straight through the cute little fishy, but they certainly made the fish more difficult to remove from the spear, so I consider them a success as well.

Too bad I don’t like the taste of perch.

I gave the fish to the cats on the jetty and went home with a puffed chest and a bounce in my step.

I’m beginning to think of this design as a poor man’s speargun.

I like it. It’s simple and effective.

But now it has me thinking of other ways to make a cheap speargun…

Stay tuned…

Funting with a Polespear

I have recently added a new hobby to my life.

The timing couldn’t be worse, really.

I already have a 2 year-old daughter, a baby boy due any day, a full time job, a wife, and a large number of unfinished projects, but now I have to accommodate the compulsive urge to kill fish with pointy objects.

I grew up in the Seattle, Washington area and always enjoyed fishing, but somehow, since moving to San Diego 10 years ago, I haven’t found to time to go fishing.

I guess the problem is that I’m pretty busy with many other areas of my life, and it’s hard to justify spending a few hours on a weekend sitting and  waiting for a fish to commit seppuku with a hook on a string.

Then I discovered spearfishing. Spearfishing is different, it’s like snorkeling with a purpose. It’s not just sitting around waiting, or even just swimming around and looking, it is hunting. Fish hunting. Funting. 

I’ve gone twice now, and I’m mildly obsessed.

As is the case with most of my hobbies, it’s not enough for me to just participate in spearfishing, I have to improve on it, customize it, make it better, or at least make it my own.

To this end I modified the tried and true polespear to add a trigger mechanism.

The polespear design is simple: it’s a spear with a rubber band attached to the base. To kill a fish with it, you hook the rubber band with your thumb, stretch the band toward the tip of the spear, and then grab the spear shaft near the tip in order to hold the band under tension. Then you point it at a fish nearby and loosen your grip, allowing the spear to lurch forward; ideally impaling the fish in the process.

The idea to modify this weapon came to me when my friend complained about his hand getting tired from swimming around holding the polespear cocked and ready to shoot. 

I decided that the polespear would be better if it had a trigger, and came up with this design:
PoleSpear

Then I built it…

First I took a piece of stainless steel and shaped it into a snug-fitting collar that I attached near the tip of the spear with a spring pin.
PolespearMod

Then I glued together a few pieces of wood (something like teak that I had laying around from old patio furniture), drilled a hole through it (slightly large than the spear shaft), cut it to and arbitrary shape using the bandsaw and affixed a little latch (also made from stainless steel) to hook onto the collar.
PolespearMod

To keep the spear from traveling too far, I added a collar at the base with some soft rubber tubing to act as a cushion when the spear is stopped (I think the piece of rubber is an in-sink garbage disposal adapter).
PolespearMod

To use the spear, I hook the rubber band through the wooden handle, and then slide the handle up the spear till it latches onto the collar at the tip.
PolespearMod

PolespearMod

And then I fired it at a piece of plywood.
PolespearMod

I will hopefully get to use this to kill a fish this weekend, if my son doesn’t disrupt my plans by being born.

Update: I used this over the weekend and probably killed a few fish. I say “probably” because I didn’t actually “catch” any fish.

The rubber band I used is the standard light-duty polespear band, and the added weight/drag of the collar seems to have slowed the spear down just enough to really damage a fish but not actually skewer it. The result is that there are an number of disabled fish hobbling around the waters off the San Diego coast, if they are lucky. The unlucky ones died slowly Saturday morning, trying to figure out why I feebly stabbed them with a dull piece of metal.

The trigger itself worked beautifully, and I’ve ordered a more powerful band that should many little fish fatherless when I next enter the waters.